
There are many reasons to set up an extra eSIM in your iPhone: for example, to save on foreign mobile data fees and keep you safe from insecure Wi-Fi hotspots when travelling. Although managing an eSIM will differ depending on each provider, there are set ways of using an eSIM with your iPhone that it will prove useful to get to grips with in advance of your travel.
Even if you’ve left it until you arrive at your destination, our eSIM tips here should quickly guide you on your way. Depending on your iPhone model and version of iOS, plus your carrier and geographical region, these tips should show you exactly what to do. Older iPhones may vary a little, but not significantly enough to make these step-by-step walkthroughs very different from what you’ll see when entering the iPhone Settings app.
First, you should research which eSIM plan is best for your needs, download and install it via the provider’s app and/or in iPhone Settings before departure, and activate it on arrival (most eSIMs do this automatically when you arrive at your destination and connect with a network).
Most eSIM providers offer only data (saving you expensive roaming fees), which will cover messaging apps such as Messenger and WhatsApp but not standard voice calls and texts that will be routed through your usual SIM instead. If you want the whole package, then purchasing a roaming add-on from your usual mobile service provider might work out better value. If you can get by with WhatsApp and other app-based messaging services, you shouldn’t need to pay additional roaming fees for calls and texts.
There are exceptions: with Holafly’s eSIM monthly or annual plans, it’s possible to get a phone number for incoming (not outgoing) text messages, which can be useful to receive one-time passwords and verification codes or complete two-factor authentication (2FA) logins. AloSIM offers you a phone number in more than 300 area codes for making calls and sending texts.
Let’s get started.
Choosing your eSIM plan
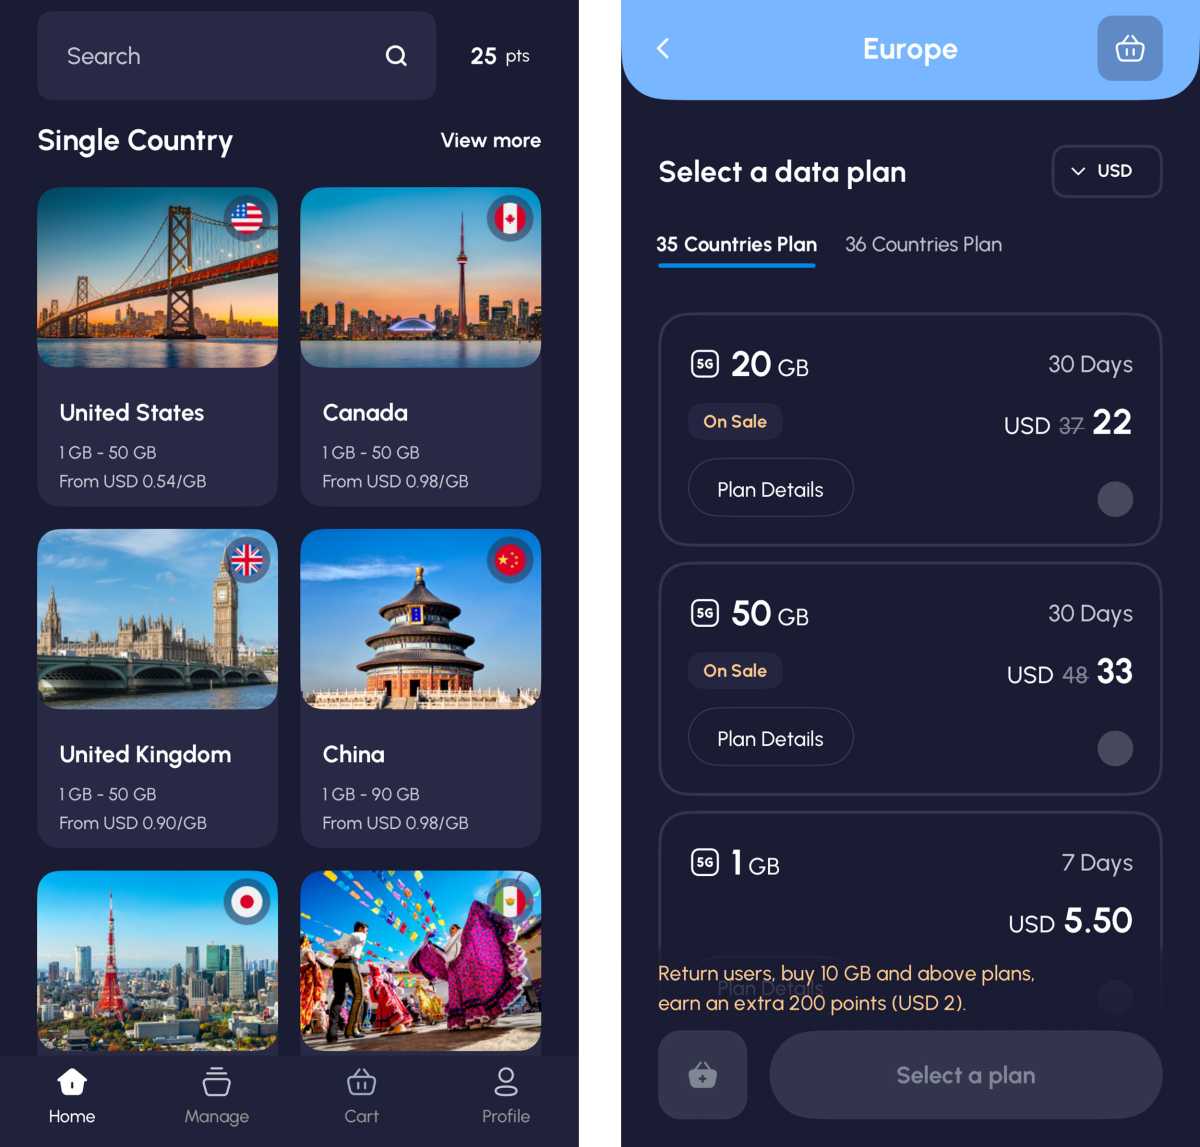
There are plenty of eSIM providers offering affordable plans. We have selected some our favorites in our roundup of the Best eSIM plans, including Saily, Nomad, Ubigi and GigSky.
The process is similar for each. You can choose the plans on either the provider’s website or in its app. The example below shows some of the eSIM plans from Nomad.

Simon Jary
Be realistic about how much data you will need – it may be more than you think or much less if you are careful not to use it up watching repeats of your favourite shows on Netflix using mobile data instead of Wi-Fi – although you can top it up if you run low, as we explain later.
Google reckons that 1GB of data would enable you to spend around 20-30 minutes a day checking emails, browsing the web or posting on social media, unless you’re a heavy Instagram Reels or TikTok video user. Streaming 4K video, on the other hand, can use up about 7GB an hour!
It’s worth checking which top-up packages come with the plan you are planning to purchase to ensure you can top up in small increments rather than just double up what you first purchased, which will be unnecessary if you just need a little at the end of your trip.
If the eSIM provider’s payment currency is in a non-domestic currency, you may incur foreign transaction fees. Airalo, for instance, charges in US dollars only. If you use a bank or credit card (such as Revolut or Monzo) that allows multiple currencies, make sure you use that to purchase the eSIM.
How to install an eSIM on iPhone
After checkout, follow the instructions to install your new eSIM.
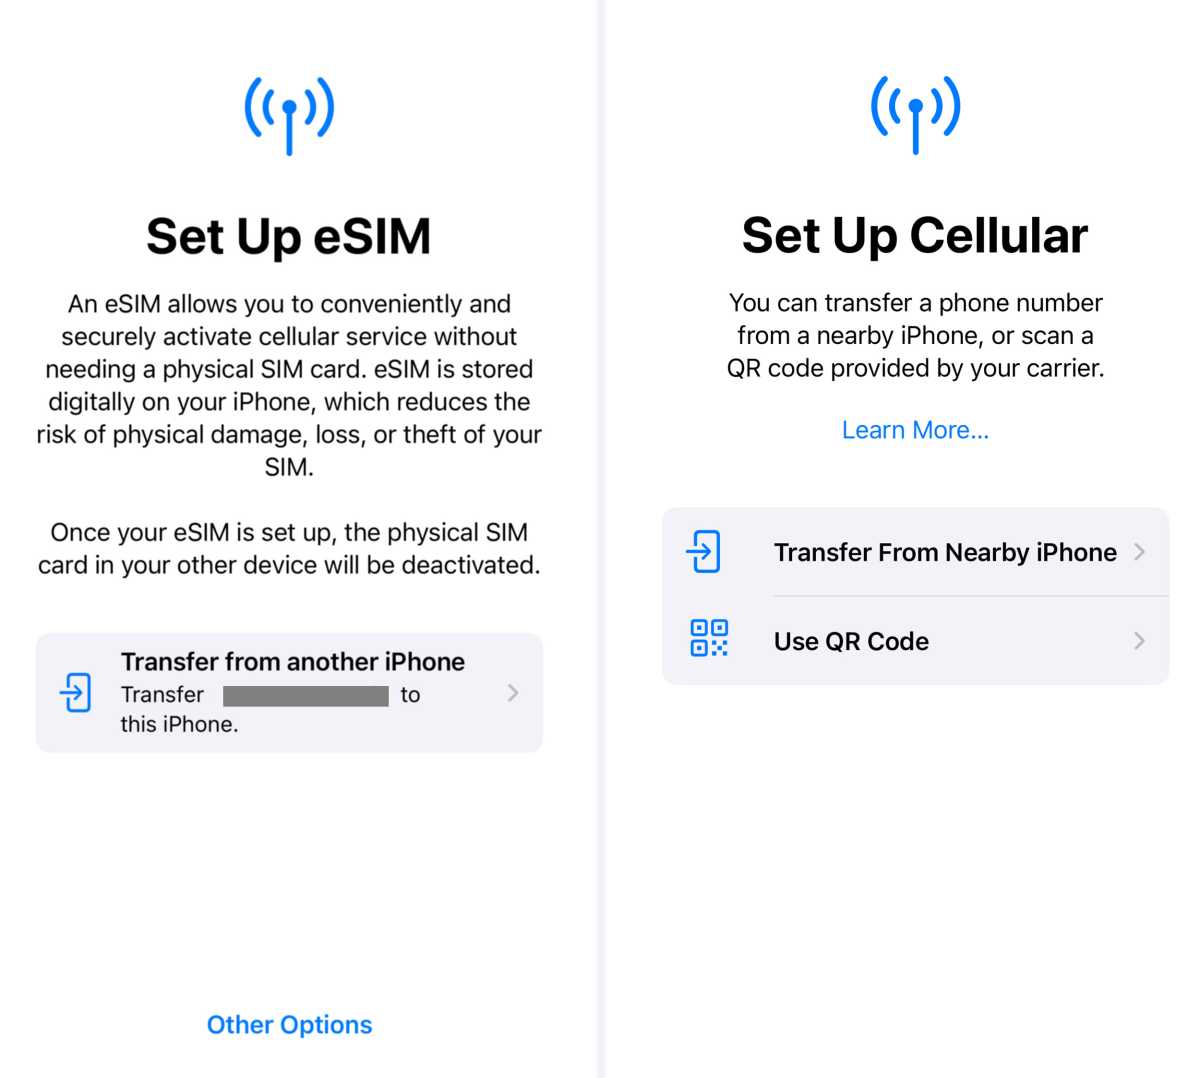
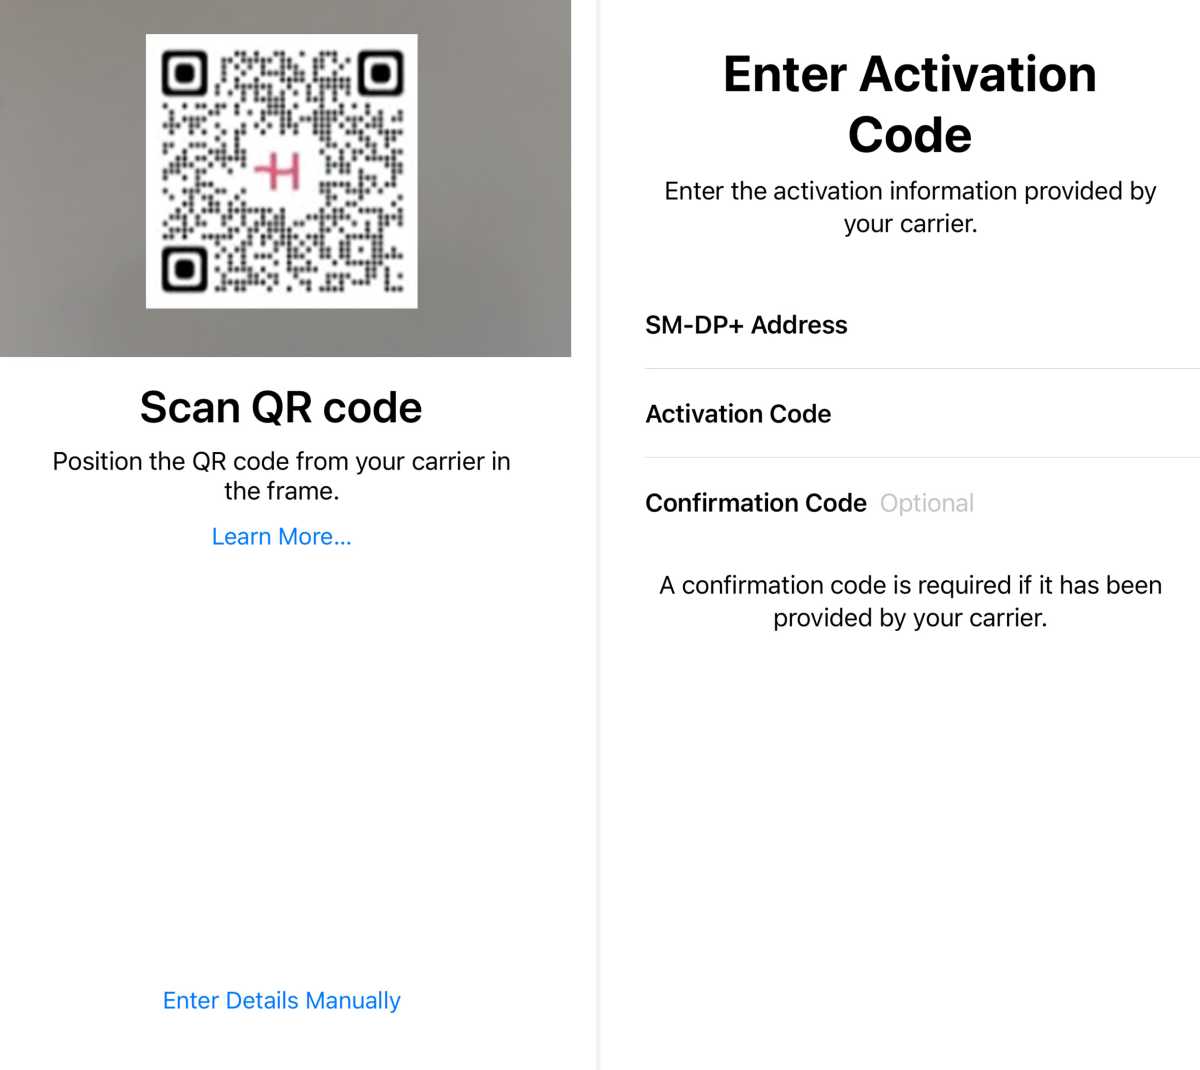
Most eSIMs can be installed automatically via guided instructions in the provider’s app or via a link sent by email, but some. For example, Jetpac and Holafly, may require you to scan a QR code which is a common but slightly cumbersome process as it requires you to take a photo of the QR code with another phone and then scan it with your phone.
On iPhones with iOS 16 or later, you can also transfer an eSIM from another iPhone.
If you see the following screens during installation, you will probably have to complete some extra steps on top of the provider instructions. If you don’t see them, move on.

Simon Jary
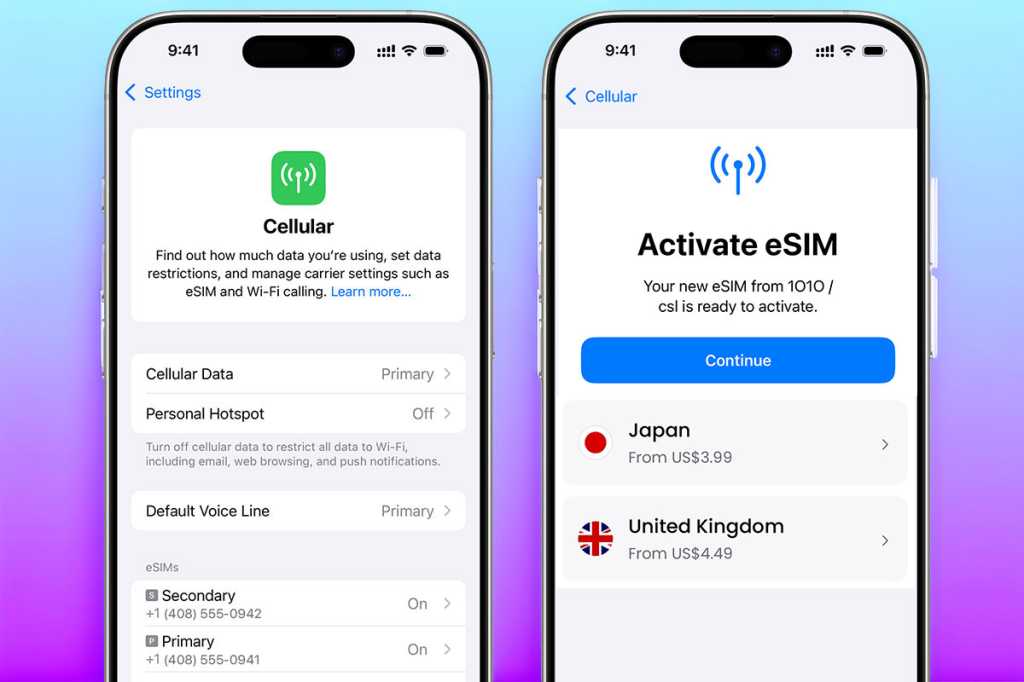
If you can’t use a QR code or link, you can manually enter the eSIM information provided by your network provider. This requires you to input data sent to you by the eSIM provider. To reach this stage, you need to go to the “Cellular” setting in the iPhone’s Settings app, tap “Add eSIM”, choose “Use QR Code” and then tap “Enter Details Manually”.
Do this when still on your home network, as you need internet connectivity to complete the process.
The QR code and manual methods are still available as a fallback, especially for users on devices or operating systems that don’t yet support automatic installation. Most people successfully install the eSIM directly through the provider’s app on their first try, so the QR code is usually not needed.

Simon Jary
As most eSIMs download directly, we hope you can avoid the above QR code and manual options.
How to switch on eSIM on iPhone
Once you have downloaded the eSIM you need to turn it on in your iPhone’s Settings. You can set it up anytime before or during your trip.
Your data plan activates only at your destination, so you donʼt have to worry about data being used up even if you set it up beforehand. Note that you need to have internet access when activating your eSIM, which might not be possible at the airport or in the taxi taking you to your hotel.
Here’s how you do it.
1. Navigate to and tap the Settings app on your iPhone.
2. That takes you to the first Settings page. Tap the option “Cellular” in the U.S. (or “Mobile Service”) in the U.K. Here you’ll find the main Cellular (or Mobile Service) page, where you can manage data settings, set data restrictions and find out how much data you are using. Under the heading “SIMs” you will see your eSIMs and primary SIM if you have a physical SIM card in your phone.

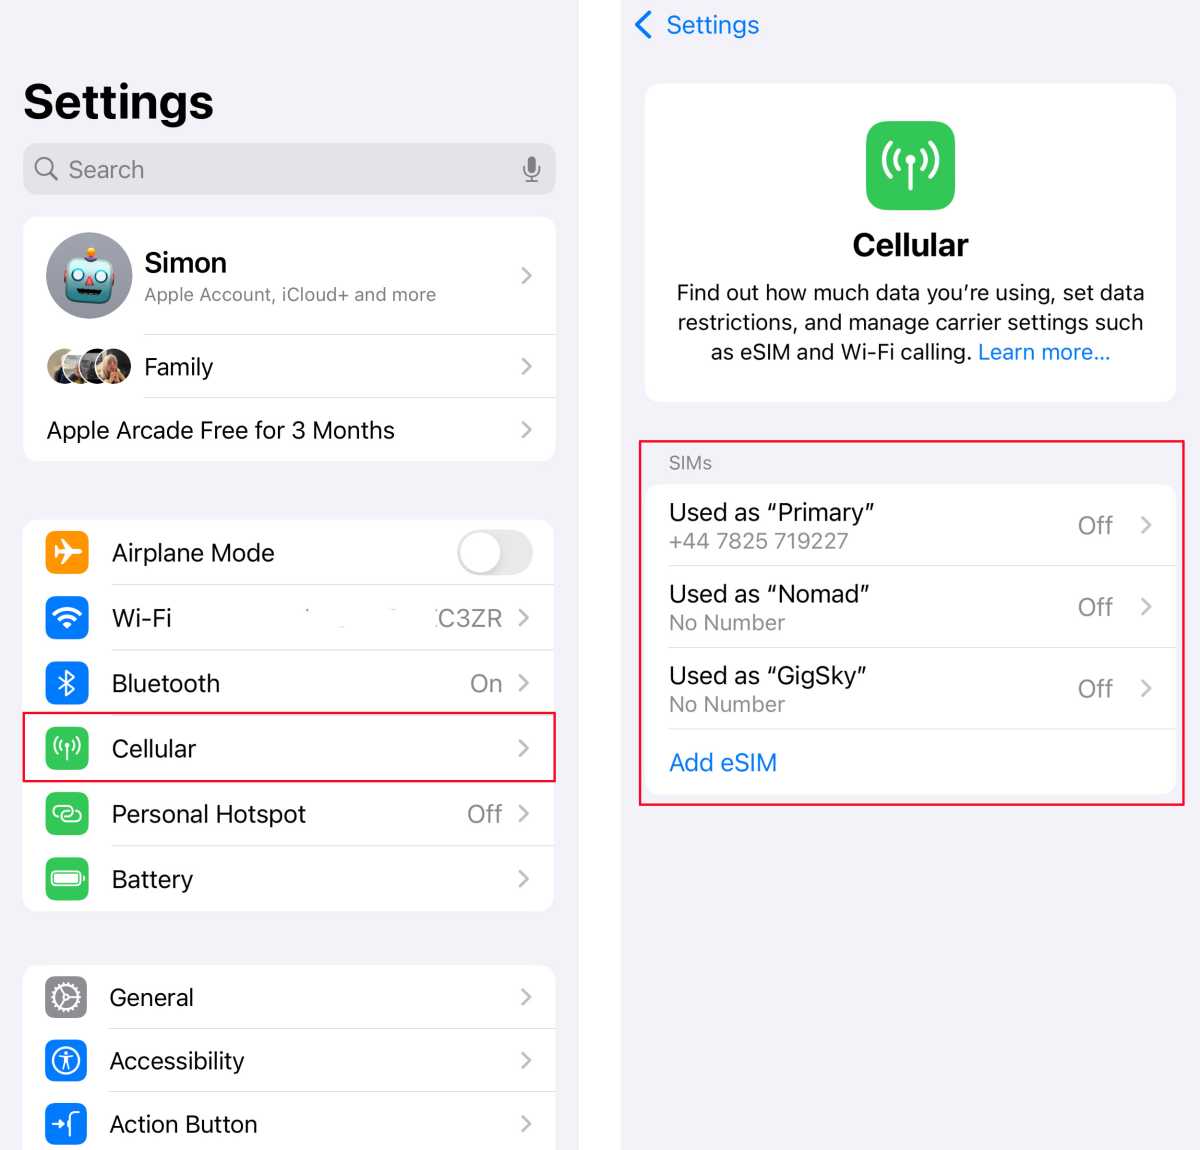
Simon Jary
3. Click on the eSIM that you want to enable.
4. On the screen you are taken to, toggle the switch to on (green). Once switched to on/green, your eSIM will be enabled.

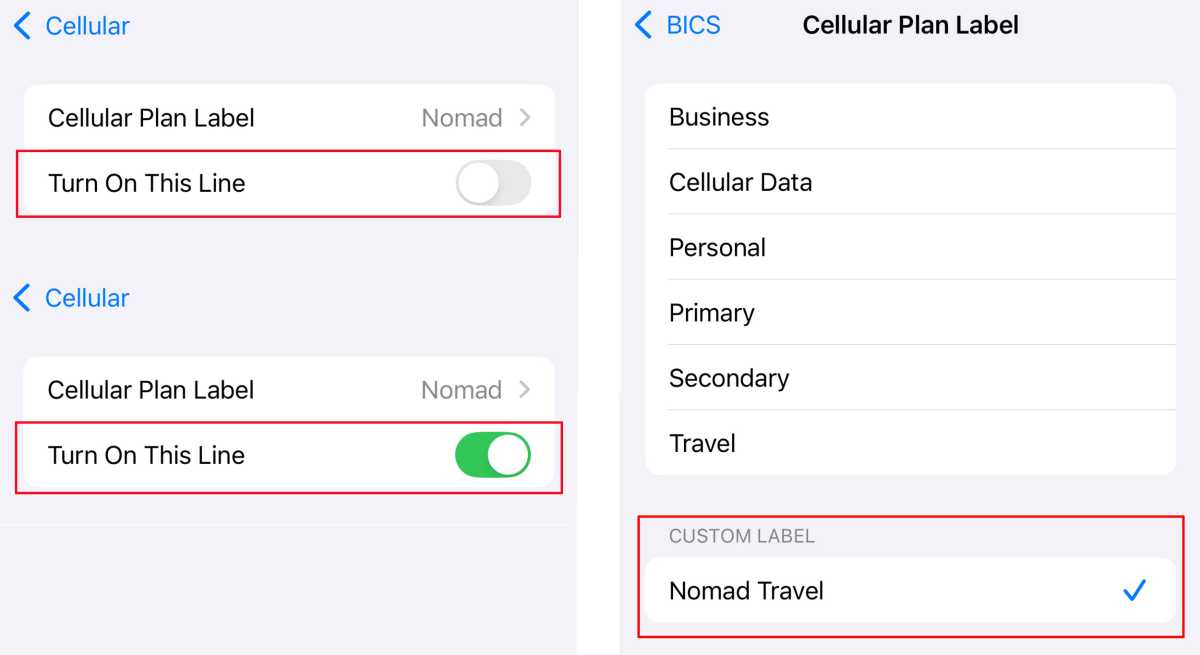
Simon Jary
5. Handily, you can rename the eSIM so that you know which you are using. You can change the “Custom Label” to the name of the eSIM provider or the main purpose you have installed it for: eg, EU Travel, Asia Travel, Business, and so on.
As eSIMs are often downloaded for specific trips, it might help to make this as obvious as you can; for example, “Airolo Italy Trip”.


GigSky
How to turn on eSIM data roaming on iPhone
One of the principal reasons for using an eSIM from a provider other than your primary carrier is to save on data-roaming fees when in another country.
Data roaming is when you use your phone’s internet connection and mobile data when you are outside of your home mobile network’s coverage area. With data roaming turned on, you can access the internet, send messages, and use data-dependent apps – such as Maps and video streaming services – while connected to a different mobile provider. As much as you try, you won’t be able to rely on free Wi-Fi all the time—and “free Wi-Fi” isn’t always a safe and secure option.
Third-party mobile carriers will almost certainly charge you exorbitant data fees that you might not even know are racking up while enjoying your travels.
When you arrive in a new country, your phone will automatically search for available networks. If data roaming is enabled, it will then connect to one of these networks, and that carrier will start supplying its data services. You won’t be charged by that provider but by your home carrier based on its roaming agreements with the foreign network, but you’ll be paying top dollar for every megabyte of data that you use.
If “Data Roaming” is toggled off for your primary/home SIM, your phone carrier cannot charge you for data usage on vacation. Instead, you set up your eSIM to handle the data-roaming duties.
If you need more data while you’re away, most eSIMs will let you top up the data later if required. We’ll show you how to load extra data to an eSIM further on in this feature, although the process will differ with each eSIM provider.
1. Tap the Settings app on your iPhone.
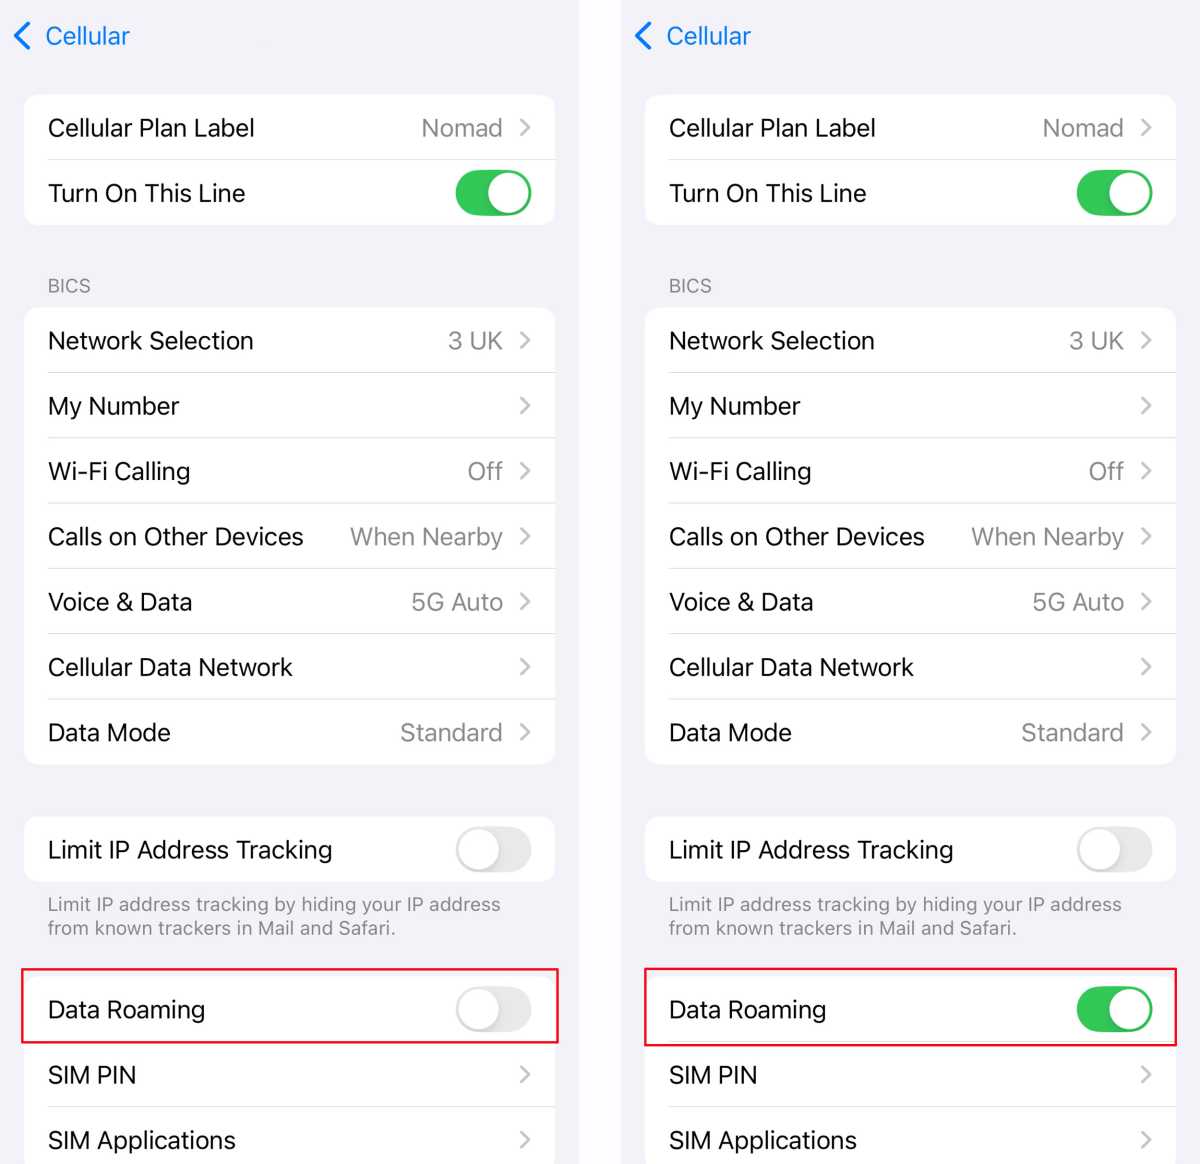
2. Tap the option “Cellular” in the US (or “Mobile Service” in the UK).
Simon Jary
3. Under the heading “SIMs” you will see your eSIMs and primary SIM if you have a physical SIM card in your phone. Click on the eSIM that you want to enable.
Don’t worry if the eSIM states that it is turned “On” before you travel. It shouldn’t kick in until you arrive at your destination – but to be sure don’t switch data roaming on until you reach your destination if installing before you travel.

Simon Jary
4. Scroll down to “Data Roaming” and toggle that button to “On”. The button will turn green and your phone is ready to start using data via that eSIM.
In the example shown above, before the “Data Roaming” option there is another option called “Network Selection”. This will show you which local network the eSIM has connected you with (in this case, it’s the UK’s “3” network).
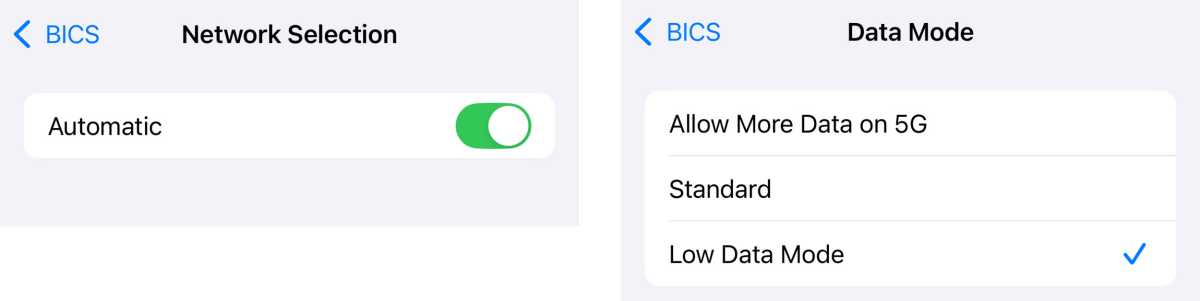
It’s best to keep this option turned to “Automatic” as the eSIM will choose the network with the best connection, but you can toggle this off if you want to choose a specific network while away. Just tap “Network Selection” to check it’s set to “Automatic”; see below.

Simon Jary
“Data Mode” is useful if you want to reduce the amount of data being used by the phone. For example, you can select “Low Data Mode” that uses automatic updates and background tasks; see above.
Note: Unless your eSIM gives you a new phone number for calls and/or texts, always choose your primary SIM if you’re asked to choose a default line for calling and messaging.

Ubigi
How to add extra data to your eSIM on iPhone
If you thought that you could get by with 1GB of mobile data on your weekend city break, you may be surprised how much data is consumed by using maps and other apps to guide you around your new environment. Hooking up to what seems like “Free Wi-Fi” at that café or on the beachfront may seem like a great deal, but it can leave your phone vulnerable to data and identity theft – so using the eSIM’s mobile data is always the safer option.
Most eSIM providers let you top up the data when you run out or get low. Each will have their own process for doing this and most make this pretty simple – after all, they want you to keep spending, so they shouldn’t make it difficult.
As an example, we installed an eSIM from one of our favoured providers, GigSky, which offers top-ups through its app. This is the most common method.

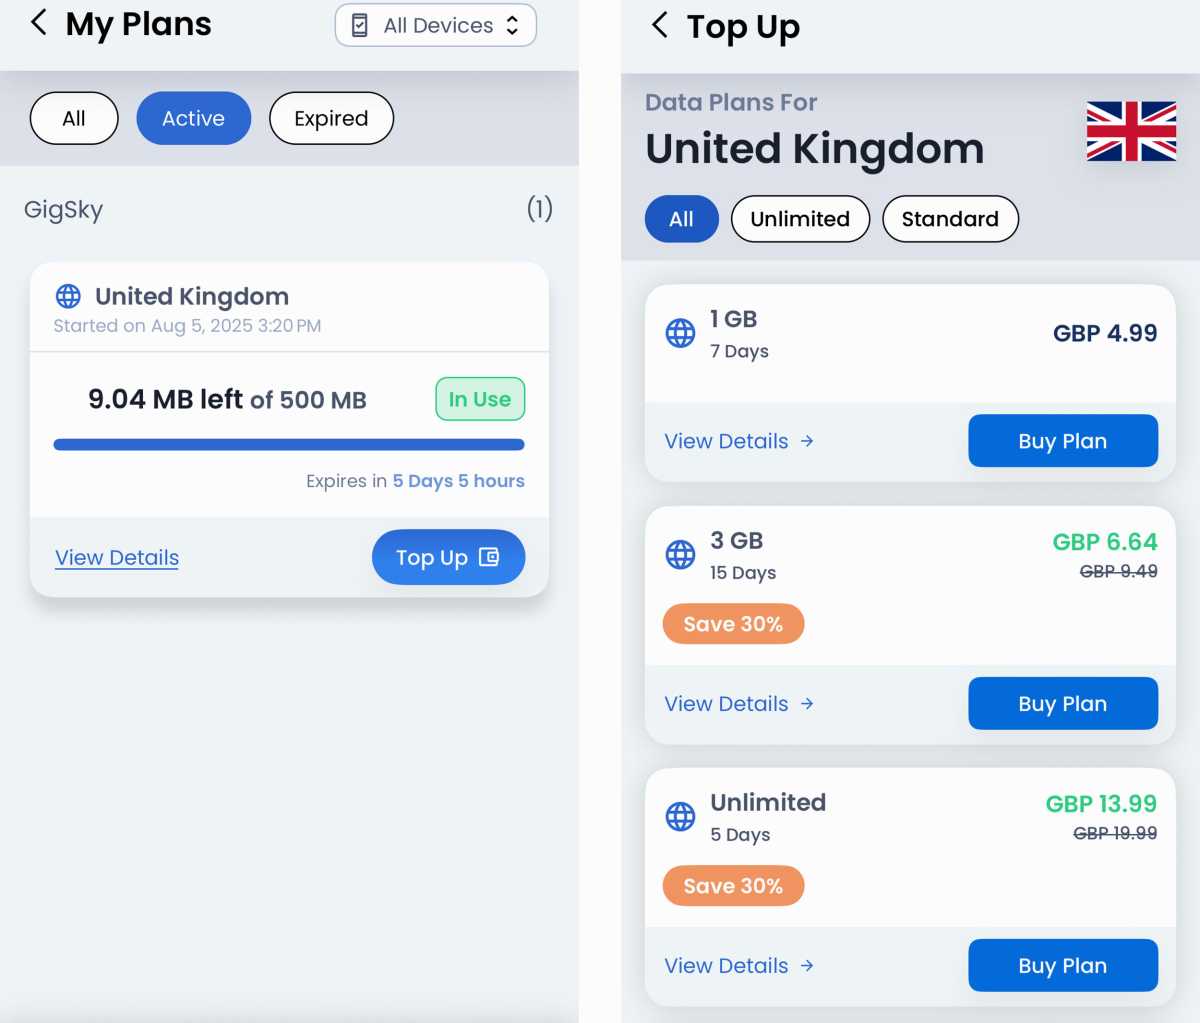
Simon Jary
Our optimistic 500MB eSIM plan for the UK is running low and we need more data! Above you can see the “Top Up” button, which brings up a range of standard top-up offers (eg. 3GB over the next three days or unlimited data over 5 days).

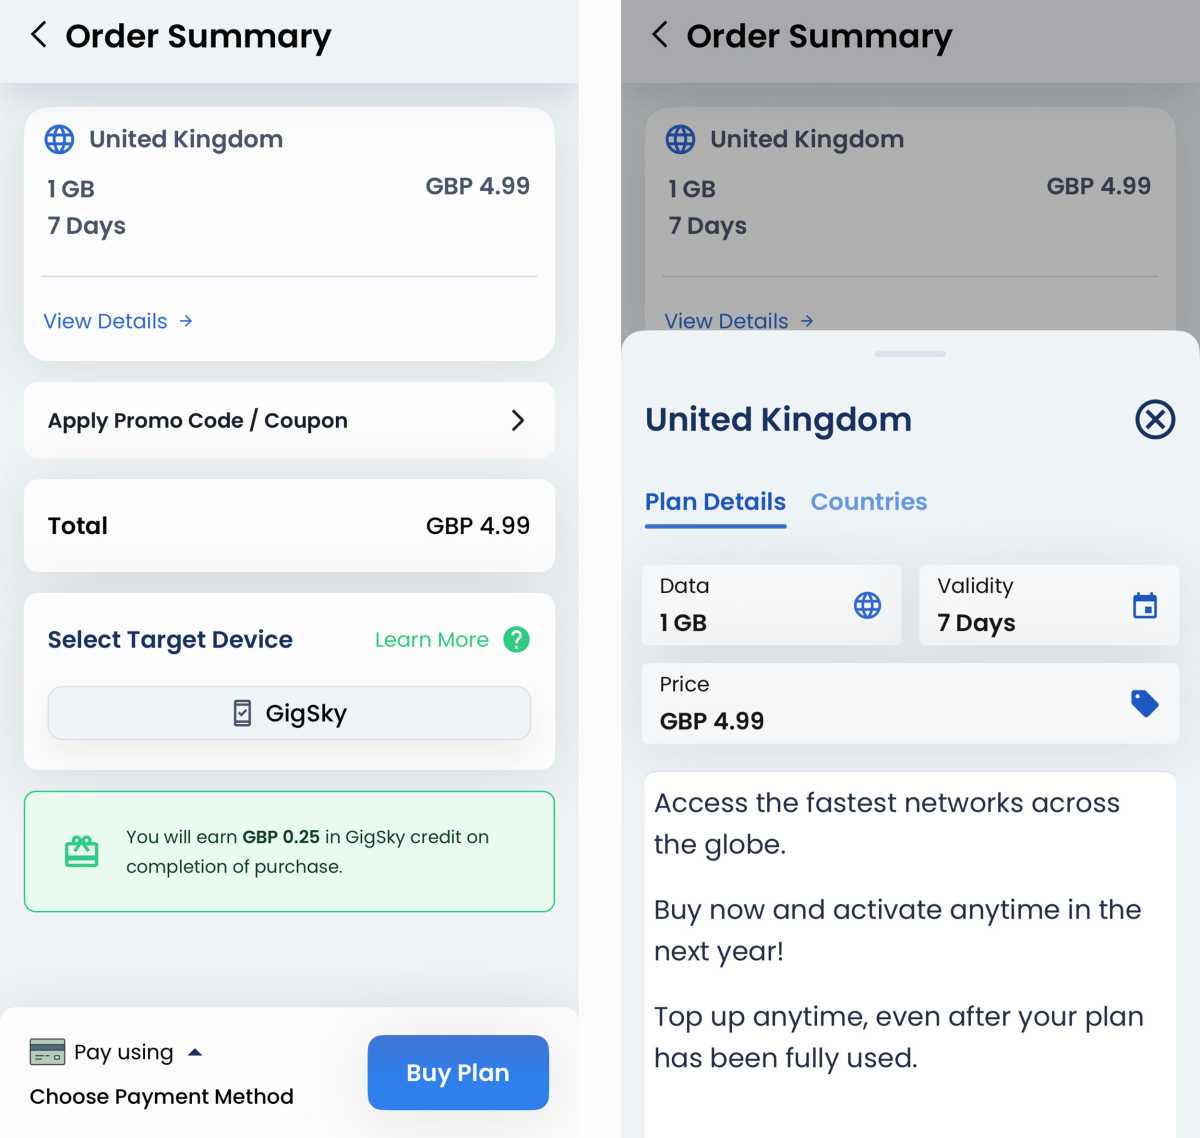
Simon Jary
I think I can get by with an extra 1GB over the next week, so choose that top-up option.
That’s all there is to it! Now I have a bunch more data to use up. If I need more, I can just top up again, although topping up with more at the first purchase would be better value.

Saily
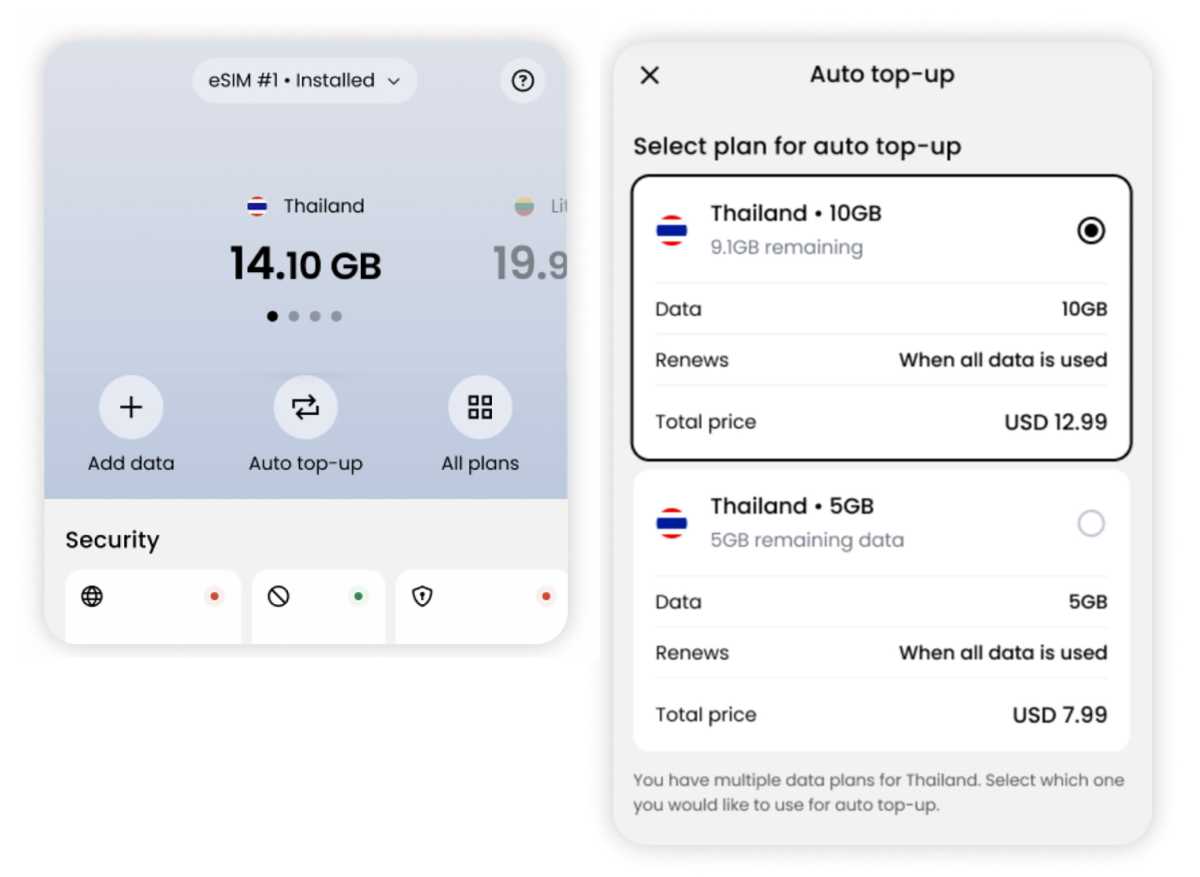
Some, such as Saily (shown above), can be set up to automatically renew your data plan (“Auto Top-Up”) once you have completely depleted it, which should prevent you from running out of data unexpectedly. This feature can also be cancelled.

Saily
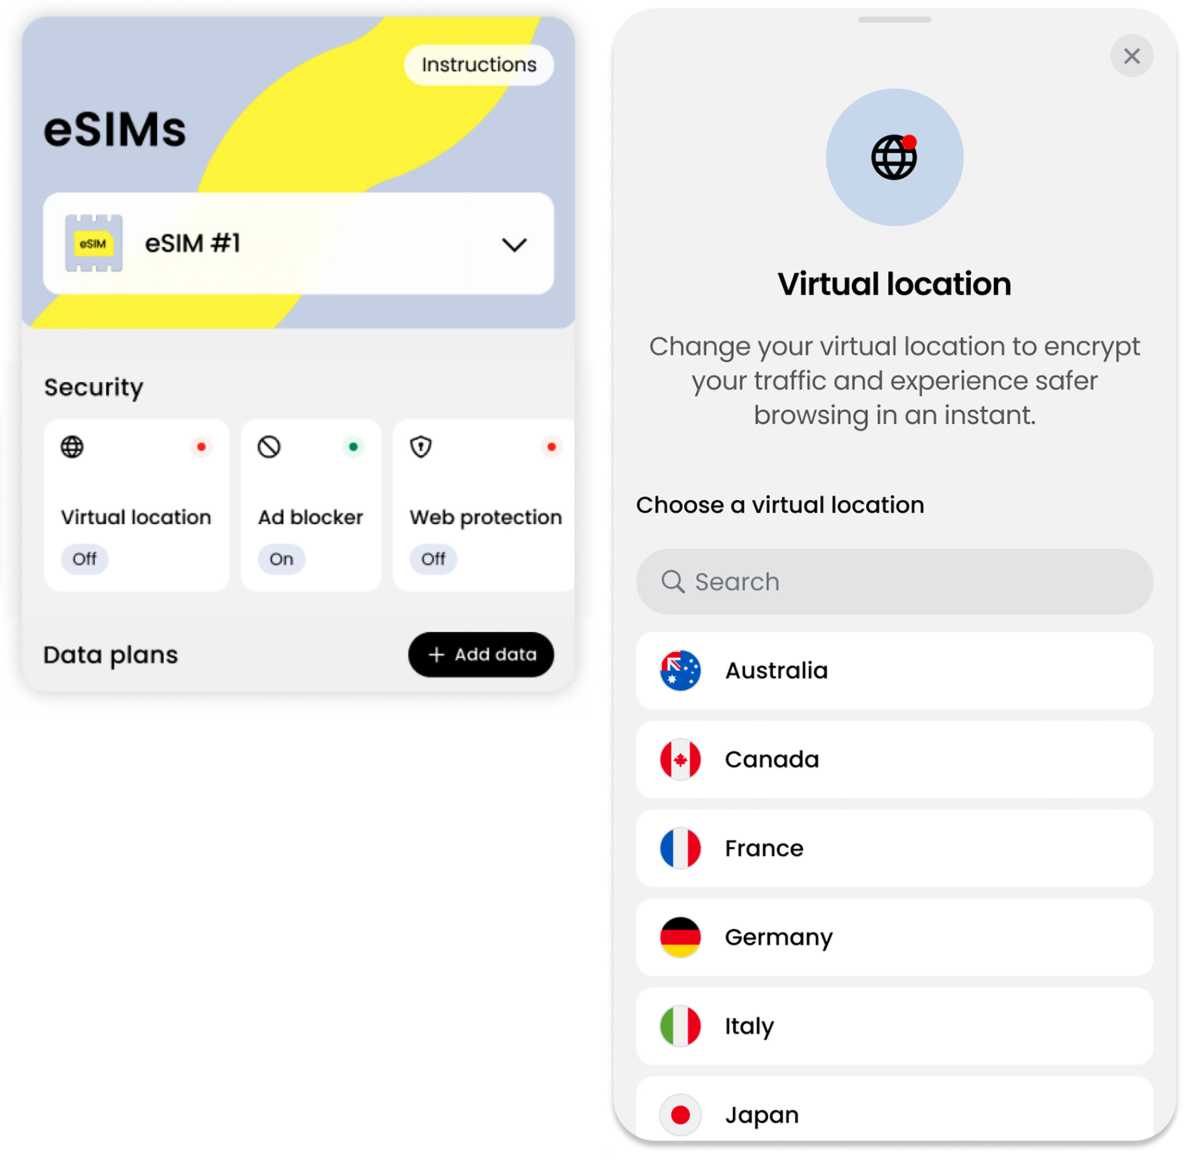
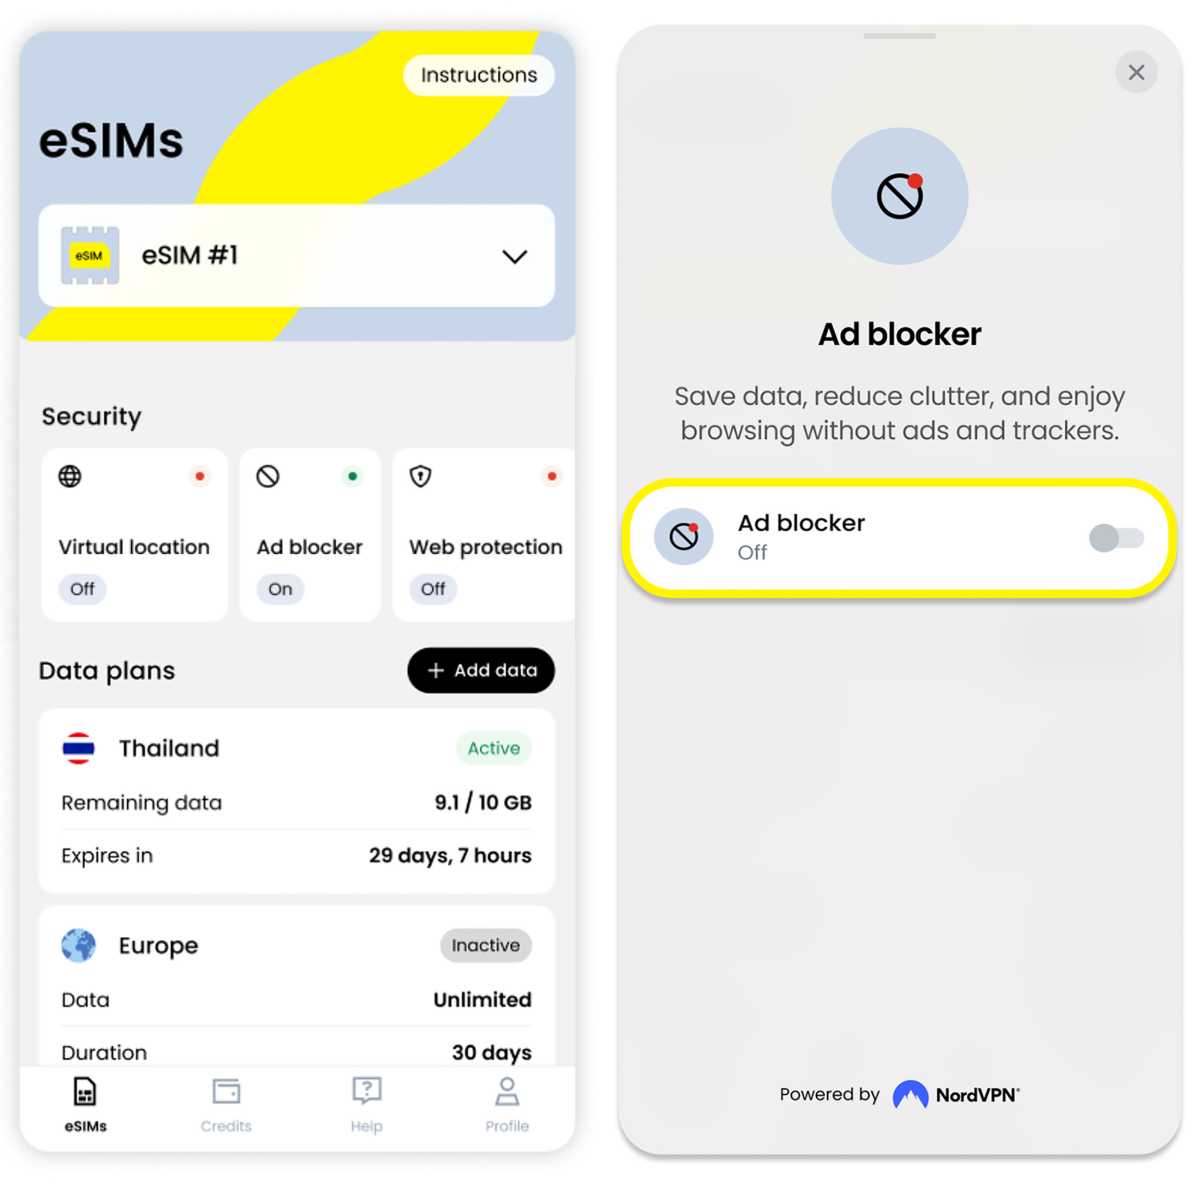
Enabling a VPN or adblocker with your eSIM
Some eSIMs boast extra security features, such as VPNs (Virtual Private Networks) and adblockers.
A VPN creates an encrypted connection between the device you’re using and a server on the internet. It increases your data security and can be used to trick services, such as BBC iPlayer or Netflix, into thinking you’re still in the region that your account is based in even though you’re somewhere else – thus allowing you to watch your favorite shows even when on holiday.
While travelling in Australia, for example, you might be seen by iPlayer as browsing from the UK and so would be able to watch BBC shows as if you were streaming from London. Find out more in our What is a VPN explainer.
eSIM provider Saily is a spin-off from NordVPN, which is one of Tech Advisor’s recommended VPNs, so it’s not surprising that its eSIM includes a VPN service. You choose a virtual location on the Saily app for your cellular internet traffic to get routed through a NordVPN server in that location. Websites you visit won’t be able to trace you, as they see only NordVPN IP addresses from the location you picked.
Mobile internet traffic is more difficult to inspect compared to traffic on public Wi-Fi. As the Saily Virtual Location works only on cellular data, it doesn’t require as much encryption and is therefore not dependent on your device’s processing power to manage encryption. As such, it doesn’t lean on your iPhone’s battery life like a standard VPN does.
Another premium, Tech Advisor-recommended VPN provider with its own eSIM service is ExpressVPN, which offers eSIMs through its offshoot Holiday.com. It doesn’t list actual VPN tools within the eSIM, so it is not as customizable as Saily’s.

Saily
Another useful tool for saving on mobile data usage is an adblocker that prevents data-heavy ads from loading on websites.
Ads hosted on the website itself, rather than downloaded from a domain, won’t be blocked. Saily’s eSIM can have its adblocker toggled on in the app’s settings, and with it switched on, the company claims you could see savings of up to 28.6% on the amount of data you use on your trip.
Link do Autor